This is a simple circuit for creating electronic music boxes, doorbells, etc., using ringtone sounds. You can build this music box circuit with very few materials.
In this project, a simple electronic music box is designed using the PIC12F675 microcontroller. The ringtone circuit can also be used in toys, etc.
Ringtone Player Circuit Structure and Operating Principle
Contents
- 1 Ringtone Player Circuit Structure and Operating Principle
- 2 Mechanical Structure and Power Supply
- 3 Ring Tone Melody Player Circuit Diagram
- 4 Multi-Melody Electronic Ringtone Music Box Schematic
- 5 Adding and Editing Melodies
- 6 Compatible Ring Tone Format
- 7 Multi-Melody Ring Tone Melody Player Operation Logic
- 8 OPERATING MODE:
- 9 Video about how the circuit works and other details
The circuit is quite simple. The PIC12F675 is programmed to play a melody stored in its flash memory.
The music played is obtained from ringtone files in RTTTL format.
These types of files can be obtained from ringtone sharing sites like PICAXE.
The melody to be played can be changed via a line in the C source code: “#define musica1” (musica2, 3, 4…).
It is possible to choose whether the music box plays continuously or only once.
After each change, the code must be recompiled using the CCS C Compiler, and the resulting .hex file must be loaded into the PIC12F675.
The sound output is provided by a piezo disc. This method provides a higher sound level.
The 20 MHz crystal used in the circuit guarantees the frequency accuracy of the played notes.
Mechanical Structure and Power Supply
Music box body: Can be made of wood, cardboard, or plastic. There must be an on/off switch that activates the circuit when the top cover is opened.
This switch can be a microswitch or a simple metal wire arrangement that cuts the contact when the cover is closed.
The circuit can be placed on a wooden or plastic base. For power supply, 2 AAA batteries or CR2025 button batteries can be used.
The sound level increases significantly when a piezo disc is attached to the base of the box.
Ring Tone Melody Player Circuit Diagram

Multi-Melody Electronic Ringtone Music Box Schematic

This improved version allows you to play dozens of different melodies using an external EEPROM.
This version also uses the PIC12F675. The melodies are prepared in RTTTL format and saved to an external 24C256 EEPROM memory.
Since the PIC12F675 does not have a hardware I²C module, communication with the EEPROM is achieved through software-based I²C emulation.
The project folder contains a .hex file for the PIC and a separate .hex file for the EEPROM.
Adding and Editing Melodies
To add new melodies:
Copy the melody codes to a plain text (.txt) file. Use Windows Notepad or similar simple editors.
Do not use WordPad or Office. These programs add extra data to the beginning of the file, causing the circuit to malfunction.
The text file can be opened with Pony Prog 2000 to check the memory usage.
When the EEPROM capacity is full, the file is converted to .hex format and written to the EEPROM.
Compatible Ring Tone Format
Not every ring tone will work flawlessly in this project. Melodies with the following characteristics should not be used:
those with b > 240
those containing non-standard symbols such as _, >, etc.
The melodies to be used should resemble the following format:
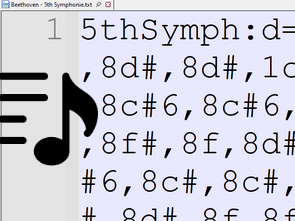
HauntHouse: d=4,o=5,b=108: 2a4, 2e, 2d#, 2b4, 2a4, 2c, 2d, 2a#4, …
Multi-Melody Ring Tone Melody Player Operation Logic
The address of the last played melody is saved to the internal EEPROM of the PICPIC12F675.
When the device is turned off and on again, the playback continues from the last melody played and progresses sequentially.
The circuit can be operated with the following power supply options:
2 AAA batteries (3V) connected in series
CR2032 type 3V button battery
Button batteries are preferable for mini projects.
An updated version with a melody selection switch has been released.
If a jumper is attached in parallel to the switch, the device will continuously play the same melody.
OPERATING MODE:
1- Remove the jumper.
2- Press and release the ‘Sel’ button until you reach the desired melody.
3- To always play the same melody, replace the jumper.
4- To play all melodies sequentially, remove the jumper.
Finally, the RTTTL converter will facilitate script previewing, and the output it provides in the form of beep frequency and delay time can be useful in different projects.
The hex-bin conversion process done with PonyProg is necessary for the Proteus simulation project; the hex file will be used in the application.
Video about how the circuit works and other details
Source: picsource.com.br/archives/10143/


