Recoil creates a short-term but very sudden acceleration effect in firearm or simulation-purpose mechanical systems. To measure this effect, in practice it is often more suitable to use a high-speed accelerometer instead of classic force sensors. The circuit here is a compact measurement board prepared exactly for this purpose.
The main task of the circuit is to measure the acceleration that occurs at the moment of firing or mechanical impact, convert it into digital data with the microcontroller, and transfer the measured values wirelessly to a computer or receiver device.
For this reason, the circuit is built on three main blocks: the LIS331 accelerometer for measurement, the PIC32MM0064GPL028 microcontroller for control, and the RN4020 Bluetooth module for data transfer.
Similarly, for those interested in microcontroller-based measurement and control circuits, the PIC24 and PIC32 examples topic can also be useful for understanding this type of project.
General Structure of the Circuit
Contents
- 1 General Structure of the Circuit
- 2 Why Is an Accelerometer Used in Recoil Measurement?
- 3 PIC32MM0064GPL028 Microcontroller Section
- 4 LIS331 Accelerometer Connection
- 5 RN4020 Bluetooth Module
- 6 3.3V Power Supply Stage with MCP1640
- 7 Single-Button On/Off Circuit
- 8 Crystal Oscillator and Timing
- 9 LED Indicators
- 10 Operating Sequence of the Circuit
- 11 Evaluation of Measurement Data
- 12 Points to Consider in PCB Design
- 13 First Startup and Test Recommendations
- 14 Brief Evaluation
Looking at the schematic, the circuit can be divided into four main sections:
- MCP1640 boost regulator stage that generates 3.3V supply
- PIC32MM0064GPL028 microcontroller and programming connections
- LIS331 three-axis accelerometer measurement stage
- RN4020 Bluetooth Low Energy communication module
The circuit is designed with low power consumption in mind. The supply can be provided from a lithium battery or an external low-voltage source. The MCP1640 IC boosts the low battery voltage at the input and creates the 3.3V line required for the system.
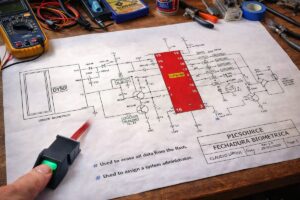
Circuit Schematic

Why Is an Accelerometer Used in Recoil Measurement?
The recoil effect is actually an acceleration change that occurs in a very short time. An accelerometer can detect this sudden movement on the x, y, and z axes. The U2 LIS331 accelerometer used in the circuit is connected to the microcontroller over the SPI communication line.
The task of the accelerometer is to convert the mechanical impact into electrical digital data. The microcontroller can read and process this data, send it raw, or convert it into the format defined in the software.
| Block | Function |
|---|---|
| U2 LIS331 | Acceleration measurement on three axes |
| MCU PIC32MM0064GPL028 | Data reading, control, and communication management |
| RN4020 | Wireless data transfer over Bluetooth |
| MCP1640 | Generating 3.3V supply from the battery |

PIC32MM0064GPL028 Microcontroller Section
At the center of the circuit is the MCU PIC32MM0064GPL028. This microcontroller both reads the SPI data coming from the accelerometer and communicates with the Bluetooth module over UART.
In the schematic, the C1, C2, and C14 capacitors around the microcontroller are used for power supply filtering. There is also a C3 capacitor on the VCAP line. This capacitor provides the stability required for the internal regulator structure of the PIC32MM family.
The J13 connector is reserved for programming and debugging. Here, the MCLR, VCC, GND, PGD, and PGC lines are seen. This connection structure is used to program the circuit with Microchip programmers such as PICkit.
LIS331 Accelerometer Connection
The LIS331 accelerometer shown as U2 is connected to the microcontroller over the SPI line in the schematic. The lines used are labeled SS, SCK, SDI, and SDO. The INT1 line is also routed to the microcontroller.
- SS: SPI chip select line
- SCK: SPI clock line
- SDI: SPI data input
- SDO: SPI data output
- INT1: Used to receive an interrupt signal from the accelerometer
C5 10uF and C7 100nF capacitors are located on the supply pins of the accelerometer. By using these two capacitors together, both low-frequency supply fluctuations and high-frequency sudden noise are suppressed.
RN4020 Bluetooth Module
In the upper right section of the schematic, there is the RN4020 Bluetooth module. This module is used to transfer the measured data wirelessly. Lines such as BT_RX, BT_TX, BT_CTS, BT_RTS, and BT_WSW are seen between the microcontroller and the module.
RN4020 is a Bluetooth Low Energy class module. Therefore, it is a more suitable choice for battery-powered measurement circuits compared to classic Bluetooth modules. C12 100nF and C13 4u7 capacitors are used in the supply of the module.
For those interested in wireless module applications, the Bluetooth USB module application can also give ideas in terms of practical connection and module usage.

3.3V Power Supply Stage with MCP1640
In the lower left section of the circuit, the IC3 MCP1640 boost DC-DC regulator is seen. This IC is used to generate 3.3V from a low input voltage. The input line is named V_IN.
The L1 4u7 inductor is the main element of the switching boost structure of the MCP1640. The R8 270k and R9 150k resistors determine the feedback ratio of the output voltage. On the output side, C11 100nF, C17 22uF, and C18 10uF capacitors are located.
| Component | Function |
|---|---|
| IC3 MCP1640 | Boost DC-DC regulator |
| L1 4u7 | Energy-storing inductor |
| R8 and R9 | Output voltage feedback dividers |
| C11, C17, C18 | Output filter capacitors |
Using a current-limited source is very useful when testing this type of low-voltage circuit. In the first startup, using an adjustable laboratory power supply instead of connecting the battery directly allows short-circuit or faulty soldering risks to be checked more safely.
Single-Button On/Off Circuit
In the middle right section of the schematic, there is an on/off control section created with the S1 button and IC1A, IC1B gates. Here, the ENABLE line controls the operation of the MCP1640.
When the S1 button is pressed, the ENABLE line changes logic level thanks to the RC components and the Schmitt trigger input structure. This method is used to reduce the bounce effect in mechanical buttons and to provide on/off functionality with a single button.
- R4 and C6 determine the startup behavior
- S1 is the button control input
- IC1A and IC1B perform logic level shaping
- The ENABLE line activates or turns off the MCP1640 regulator
Crystal Oscillator and Timing
The 7M-16.000MAAJ-T crystal shown as Q10 is used as the clock source of the microcontroller. C9 and C10 22pF capacitors are connected so that the crystal oscillates properly.
Timing is very important in measurement circuits. Reading the data from the accelerometer at certain intervals, sending it regularly through serial communication, and not missing sudden acceleration events depend on a correct clock structure.
LED Indicators
There are red, yellow, and green LEDs in the schematic. These LEDs are used to indicate the system status. For example, functions such as power, connection, measurement status, or error notification can be assigned to these LEDs in the software.
A series resistor is used with each LED. R2, R3, and R6 resistors limit the LED current. In this way, the microcontroller pins are protected from excessive current.
Operating Sequence of the Circuit
The general operating flow of the circuit can be summarized as follows:
- A battery or external supply is applied from the V_IN input
- The ENABLE line is activated with the S1 button
- MCP1640 creates the 3.3V VCC line at the output
- The PIC32MM microcontroller starts operating
- The LIS331 accelerometer is configured over SPI
- The RN4020 Bluetooth module is prepared with UART
- The measured acceleration data is sent wirelessly

Evaluation of Measurement Data
The data received from the accelerometer is not force directly; it is acceleration information. To interpret the recoil effect as force, the mass of the measured system and the mechanical connection conditions must be known. The basic relationship is based on Newton’s second law:
F = m × a
Here, F represents force, m represents mass, and a represents acceleration. However, since the real recoil event is very short-term and vibrational, in practice the raw acceleration data is recorded on the time axis, and peak value, impulse duration, and distribution according to axes are analyzed.
Points to Consider in PCB Design
In this type of measurement board, having only the correct schematic is not enough. PCB layout also directly affects measurement quality. The accelerometer must be mechanically attached firmly to the board, and there should be no flexing or loose connections on the board.
- The accelerometer should be positioned as close as possible to the mechanical center or in a location suitable for the axis to be measured
- Supply capacitors should be placed close to the relevant IC pins
- SPI lines should not be kept unnecessarily long
- The Bluetooth antenna area should be kept away from copper fill and metal parts
- The battery and regulator line should remain stable during sudden current changes
First Startup and Test Recommendations
When the circuit is powered for the first time, it should not be tested directly in the field. First, the VCC line should be checked on the bench with a low-current-limited power supply to confirm that it is 3.3V. Then the programming connection, Bluetooth communication, and accelerometer reading should be tested separately.
| Test Step | Point to Check |
|---|---|
| Power supply test | A stable 3.3V should be seen on the VCC line |
| Programming test | PGD, PGC, MCLR connections should operate correctly |
| Accelerometer test | x, y, z data should be read over SPI |
| Bluetooth test | Serial data should be received through RN4020 |
| Impact test | The measured acceleration data should be recorded over time |
Safety note: This article has been prepared only in terms of electronic measurement circuitry and sensor data collection. Live-fire tests should only be performed in authorized, safe, and legal test environments.
Brief Evaluation
This circuit is a compact accelerometer-based data acquisition board prepared to measure very short-term mechanical effects such as recoil. The LIS331 accelerometer undertakes the measurement task, the PIC32MM0064GPL028 microcontroller undertakes the control and data processing task, and the RN4020 Bluetooth module undertakes the wireless transfer task.
The 3.3V supply created with MCP1640, single-button ENABLE control, and low-power Bluetooth selection show that the circuit is suitable for portable use. With correct firmware and careful mechanical assembly, this structure can be adapted not only for recoil measurement, but also for different measurement projects where impact, vibration, and sudden acceleration changes need to be monitored.
Source: dspace.vut.cz/items/8e5811ad-205d-435c-82f7-e8e79c729e32