In general, the loudspeaker coil will light up as a result of overload or if the amplifier fails and supplies DC voltage to the output. Generally, repairs are not made for low-power speakers, but for expensive high-power speakers, repair is more economical.
Tools for replacing the speaker coil;
Hobby drill or hand motor
Scissors
Soldering iron
Toluene (used as solvent, a derivative of thinner)
Solder wire
Fine-tip tweezers
Masking tape
Radiography Transparent or inch plastic card
Epoxy resin
Black contact adhesive
A fan or compressor air gun
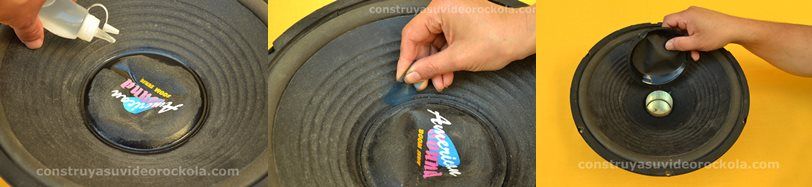
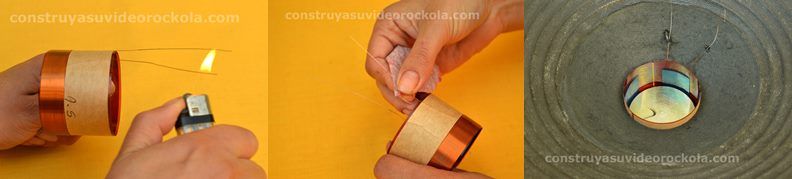
First of all, the coil cover is removed and Toluene is applied around the cover and the cover is carefully removed with a plastic part.
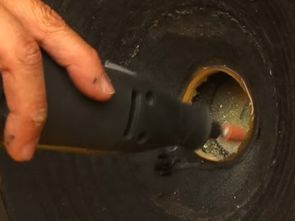
Then the soldering iron and coil connections are separated and removed with the burned coil carcass. It should be careful when separating the wires, and it is useful to slightly bend them so that they do not escape.
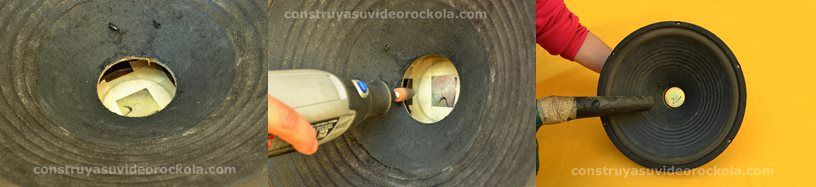
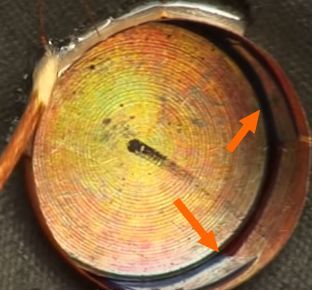
After removing the coil, the adhesive residues in the housing are cleaned by hand motor while doing this operation. In addition, dust can escape around the magnet metal inside the housing, to prevent this, you can put a piece of cloth inside and remove it at the end of the job, or you can stick paper tape on the plastic card and erase the magnet metal. Afterwards, dust and component residues are removed with a compressor.
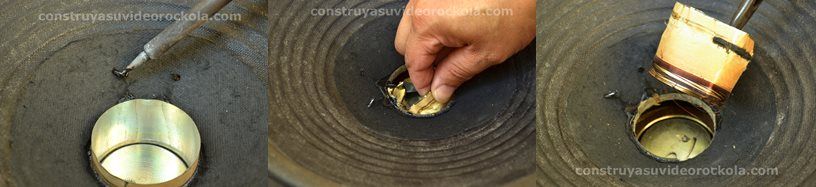
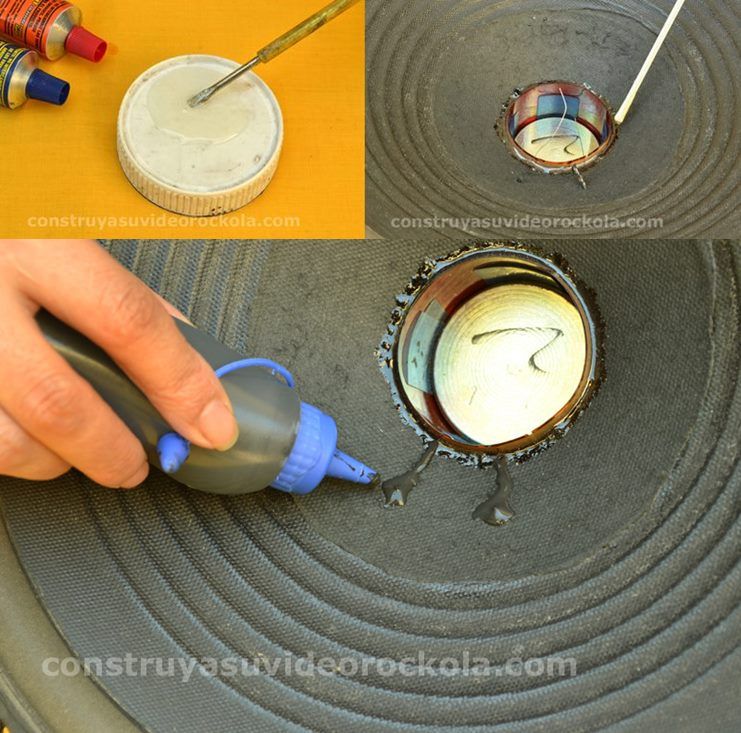
If everything went so far, the new bonnet is assembled and the coating of the parts to be soldered is burned, cleaned and mounted to the housing.
Epoxy mixture is prepared and applied around the coil. An important detail at this stage is that the core of the bobbin needs to be centered so that you can place plastic strip pieces between the magnet metal and the crow and remove it after drying.
After drying, it is checked and soldered coil wires. Coil wires are covered with black contact adhesive.
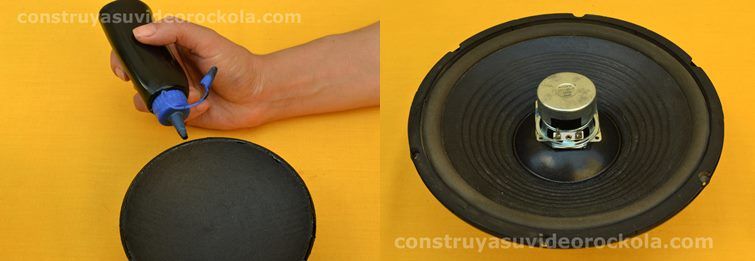
Finally, the cover is glued and placed on a weight that does not cause collapse and left to dry. The author stated that 24 hours should be waited for the sound tests.
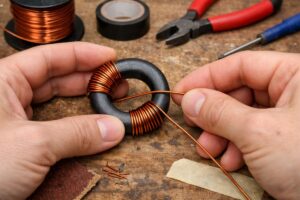
Speaker Coil Winding
Source:videorockola.com/tutoriales/arreglo-mantenimiento-parlantes/cambiar-bobina-parlante-altavoz/

Remplacement de la bobine de réparation des haut-parleurs
En général, la bobine du haut-parleur s’allume en raison d’une surcharge ou en cas de panne de l’amplificateur et fournit une tension continue à la sortie. Généralement, les réparations ne sont pas effectuées pour les haut-parleurs de faible puissance, mais pour les haut-parleurs de haute puissance coûteux, la réparation est plus économique.
Outils pour remplacer la bobine d’enceinte;
Perceuse de loisir ou moteur à main
Les ciseaux
Fer à souder
Toluène (utilisé comme solvant, un dérivé de diluant)
Fil de soudure
Brucelles à pointe fine
Ruban de masquage
Radiographie Carte plastique transparente ou en pouces
Une résine époxy
Adhésif de contact noir
Un pistolet à air soufflé ou compresseur
Tout d’abord, le couvercle de la bobine est retiré et du toluène est appliqué autour du couvercle et le couvercle est soigneusement retiré avec une partie en plastique.