The most common faults encountered in PPRC welding machines are heating element problems, cable breaks, and issues caused by the on-off switch. I encountered a thermostat failure in a small Fusion brand PPRC welding machine.
Although the thermostat on the PPRC welding machine was set to 300 °C, the thermostat cut off the power when the heating element temperature reached approximately 100 °C, and the machine’s heating element could not heat up sufficiently. This situation directly indicates a thermostat failure.
PPRC Welding Machine On-Off Switch and Temperature Adjustment Section
Contents
As seen in the image below, the PPRC welding machine has an on-off switch and a temperature adjustment section. The temperature setting is adjusted with the help of a flat-head screwdriver.
The structure is quite simple and low-cost. Since the adjustment mechanism is protected, there is no risk of accidentally disturbing the setting. In any case, these types of machines are generally used at maximum temperature during welding operations.

Thermostat and Temperature Sensor Removal
Removing the thermostat is quite simple. There is no additional part securing the thermostat; the device housing keeps the thermostat in place.
The temperature sensor is placed in a special slot inside the heating element. When the sensor is gently pulled by its cable, it comes out of its slot easily.
The excess part of the sensor cable is wound under the adjustment section of the thermostat.
Information about the thermostat used:
- Brand: Tecasa
- Current: 16A
- Voltage: 400V


When removing the voltage wires of the thermostat, never force them. The cable terminals (female connectors) have a locking tab structure.
First, slightly release the tabs and then remove the connector; this way, it will come off easily.
When reinstalling, first press the tab inward, then plug the connector back into place.


220V Cable Replacement

At first, I thought the fault in the PPRC welding machine was caused by the cable. One line of the power cable was broken, and the other line was severely worn. In addition, there was visible oxidation on the connectors connected to the switch.
After replacing the cable and performing the necessary tests, I clearly determined that the actual problem was caused by the thermostat.
If the original cable cannot be found for this type of device, using an iron cable is suitable. Iron cables have sufficient current-carrying capacity, and thanks to their braided textile covering, they are flexible and durable.
Instead of replacing the connectors on the switch connection, I chose to solder the wires directly. I insulated the connections with double-layer heat-shrink tubing. This method is both more robust and safer against oxidation.
Since there was no oxidation on the other connectors and the connections were tight, I did not need to perform any additional work.
220V Thermostat Inspection

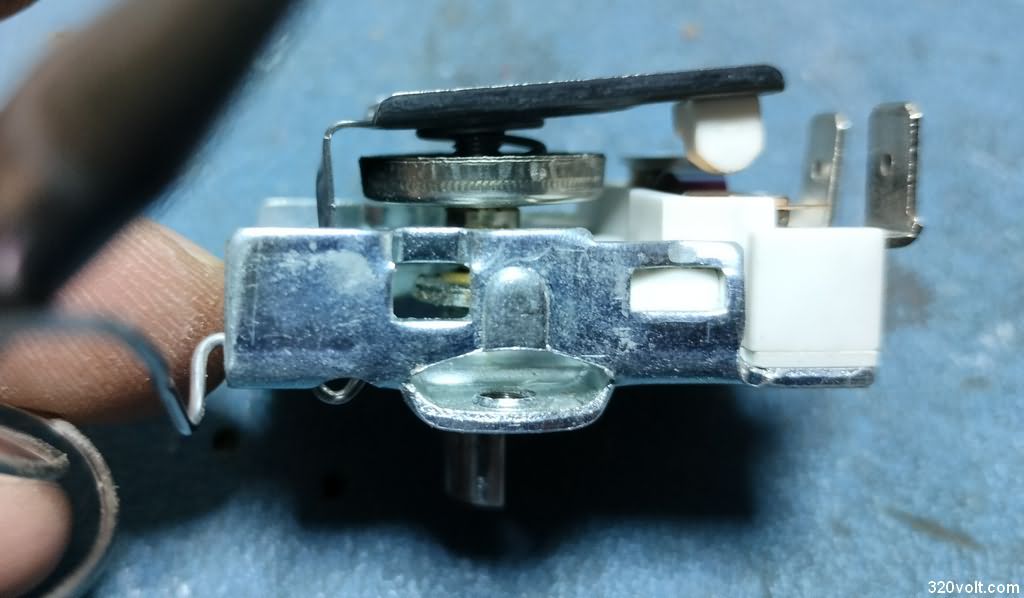


While I had the opportunity, I wanted to disassemble the 220V thermostat and examine its internal structure. Although I already knew its operating principle, it was nice to see that high-power control can be achieved with such a simple structure 🙂
The thermostat works on the principle that the material inside a small pin expands and changes consistency depending on temperature, or by using other materials that respond to heat. As a result of this expansion, the contacts open and close, controlling the power supplied to the heating element.
When I removed the contacts, I saw that they were seriously deformed. It was clear that the thermostat had reached the end of its service life. For a machine that has been used intensively in the field for years, this situation is quite normal.
Those who want to learn more detailed information about thermostats can review the “Electrical Control Techniques” course notes, especially the “Control Elements” section.
In addition, the video shared below will help you better understand the operating principle of the thermostat visually in 3D.
Thermostat / How Does It Work? (3D Animation)