Method: Salvaging ferrite cores
Why
The world is full of electronics being unceremoniously discarded. Said electronics contains power supplies. Said power supplies contain a number of magnetics, namely transformers and chokes with ferrite cores, of all sorts of sizes and shapes (well, usually E or EI, but anyway). A computer power supply will have several. A dead CFL lightbulb will usually have a pair – a toroid for the transistors and a choke for EMI suppression.
Ferrite cores tend to be expensive and difficult to source. A way to get some for free is therefore always welcomed. However, the salvaged transformers are usually potted in some sort of resin and can not be disassembled. The ferrite is also very fragile, precluding use of force bigger than small.
How
The Internet in its wisdom offered a couple hints. Some about soaking the transformers in solvents for hours or days, some about boiling the transformers in water for ten minutes. Usually the methods were wet and/or smelly and generally unpleasant.
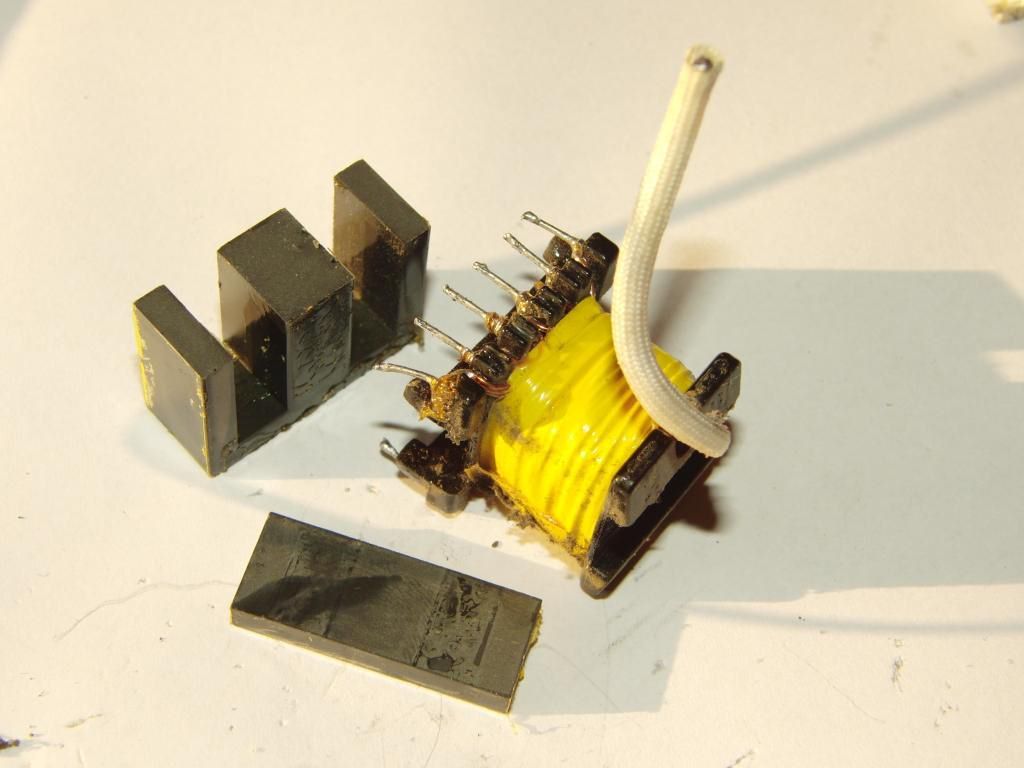
An experiment was tried with the Hot Air Blower. A ferrite transformer, after removal of the sticky tape around the core, was placed in front of its exhaust nozzle and the blower was switched on to full power. The transformer was left to cook in 200 °C air until it was so hot a drop of water sizzled on the ferrite. Then the transformer was removed from the hot air stream and the core was loosened with gentle prying with a small, thin-blade screwdriver. The material that held the bloody thing together really softens when heated up above 100 °C; the core moved slightly in the bobbin and was willing to be pried out. The other half of the core was then pushed out of the bobbin by gentle steady pressure through the bobbin’s hole.
The ferrite’s thermal conductivity is somewhat poor, patience is therefore needed. A thermocouple probe can be used for measuring the approximate core temperature, in order to know how fast it is approaching the desired above-boiling-point value.
The ferrite is also VERY fragile. Especially smaller cores are prone to breaking when not handled with a lot of gentle and loving care. Do not attempt to force the core out when it is not showing signs of willingness; patience and more hot air will do a good job here, like when a politico rides out a government crisis. Otherwise you risk cracking the core.
Cracked cores can be glued back together with epoxy, but their magnetic properties will likely be degraded due to the additional, even if thin, gap in the core.
The work goes much easier when the entire disassembly operation is performed in the hot air stream. When the operator has the hot air source between his body and the transformer, he can hold the transformer in pliers (hold it by the bobbin, then the pliers won’t be likely to crack the core) and gently tweak and pry and teases the core out of the bobbin with a flat screwdriver. Work in hot air stream prevents the transformer from cooling down while being manipulated, hardening again and eventually cracking the core; repeated reheatings are taxing for the patience and it is tempting to just use a bit more force to avoid another waiting cycle.
It is helpful to apply gentle pressure to the core from the side, first make it move inside the bobbin for a fraction of millimeter and unstick the surfaces, and only then, once the initial movement happens, become slowly and carefully lifting the core from the bobbin. Once out, push the lower part from the bobbin by applying a gentle steady pressure through the bobbin’s hole to the middle of the core; this makes it less likely to crack than prying.
Places to find ferrites
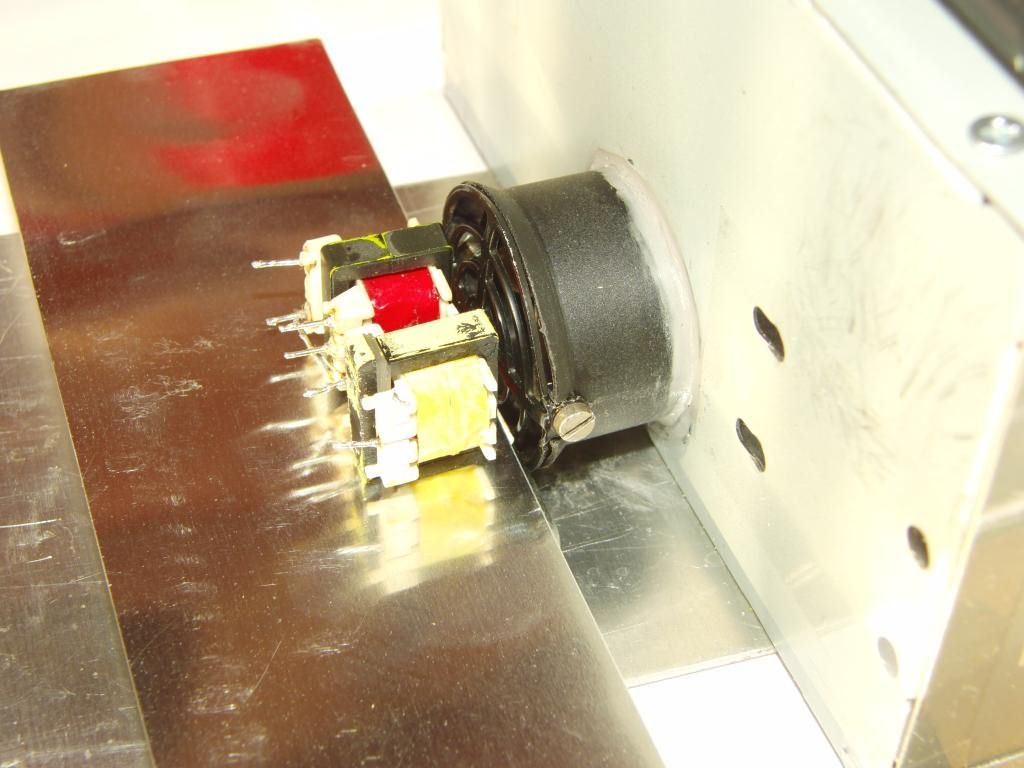
There are some common places where ferrite cores can be found. Modern electronics overwhelmingly uses switching power supplies; ferrites are used as cores for the transformers. A computer power supply usually yields one big transformer and sometimes a number of smaller ones. Other appliances (TVs, VCRs…) tend to operate with lower powers and have smaller cores. Generally, the size of the core is somewhat proportional to the peak power the power supply was rated for. The smaller cores are from either very small power supplies (e.g. a cellphone charger – even those now eschew the large iron-core transformers in favor for electronics), or various coupling transformers in more complex power supplies. Some chokes are also wound on salvageable ferrite cores that can be repurposed into transformers.
Then there are many various toroids out there. Some as transformers, some as chokes. These generally do not have to be subjected to thermal treatment to be disassembled; the wire can be unwound if necessary, or just cut out of. There usually is no bobbin to care about as the windings usually are located directly on the core.
A good source of tiny toroids for e.g. the Joule thief applications is in the recycle boxes in various electronics shops, hidden inside the discarded CFL bulbs. For the inside view of a random bulb check out the CFL reverse engineering page; note the larger EE-core ballast choke (which can be disassembled with the hot-air method) and the toroid-core transformer with three windings (which does not require further processing, perhaps except removal of the old windings).
The disassembly-capable cores come in two common variants, EI and EE. The former one has a bar (I) laid over the E part with longer prongs; the I part can be usually removed easily, which is paid for by the added complexity of removal of the core going through the entire depth of the bobbin. The EE variant comes as a pair of identical E-shaped cores; the first one has to be carefully pried out (and is the one most prone to crack when too much force is applied – be GENTLE), the second one can be usually just pushed out of the core by applying pressure at the center prong through the bobbin.
Beware of air gaps. Many cores have air gaps in order to soften their saturation characteristics. This may be an advantage or a disadvantage for a given planned use. Just check what is the case by assembling the core together without a bobbin. A detail that is often overlooked when handling secondhand magnetics.
TODO
A movie of the process
A method to characterize the material behavior and measure the saturation, permeability and hysteresis curve and the frequency dependence of properties.

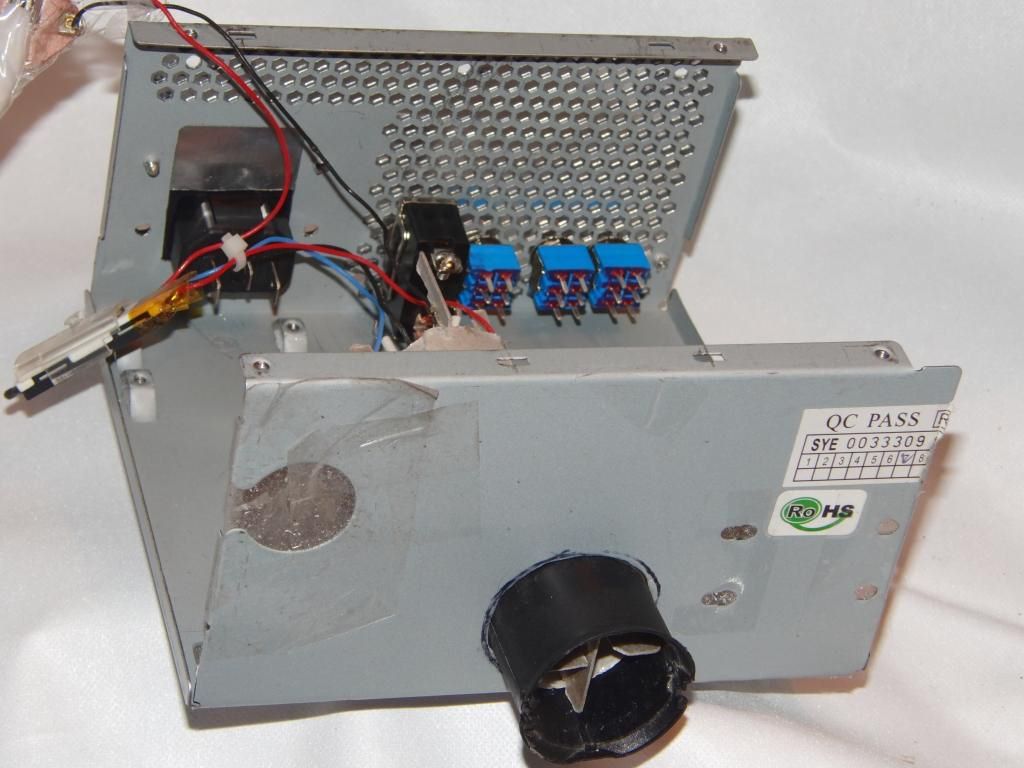


Hot air blower
Instrument
In a lab, like in politics, there is often a need for hot air; sometimes for a gentle preheating of something, sometimes for drying paint or other water- or solvent-based substance. A salvaged hairdryer was originally intended to be satisfying. However, it turned out that the airflow is too high (enough to damage more sensitive components or paint layers). More seriously, the noise of the running hairdryer was unbelievably L-O-U-D, resembling a jet engine during takeoff. (Who can ever be comfortable running that next to one’s head?) Therefore it was decided to design a modified hot air source.
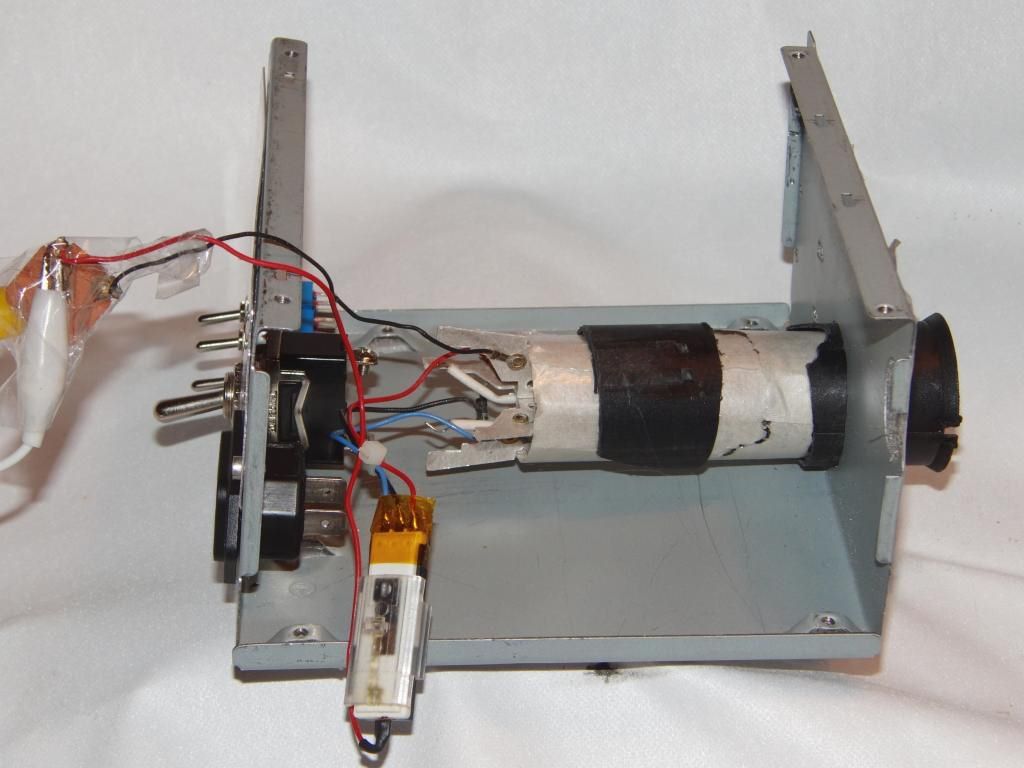
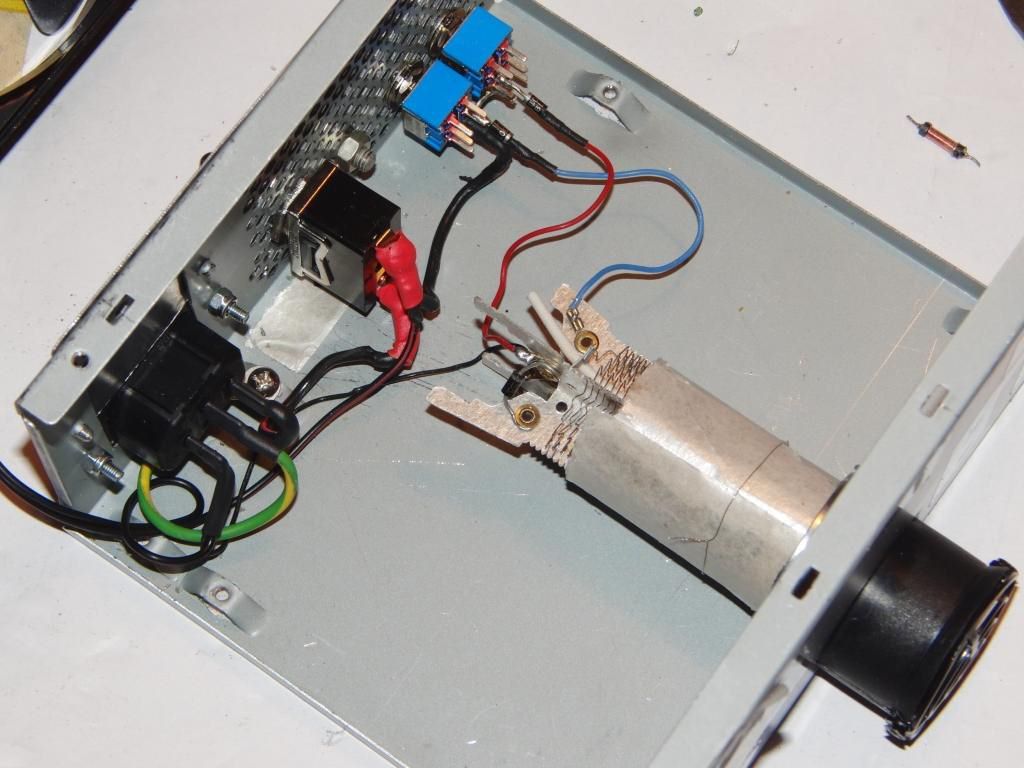
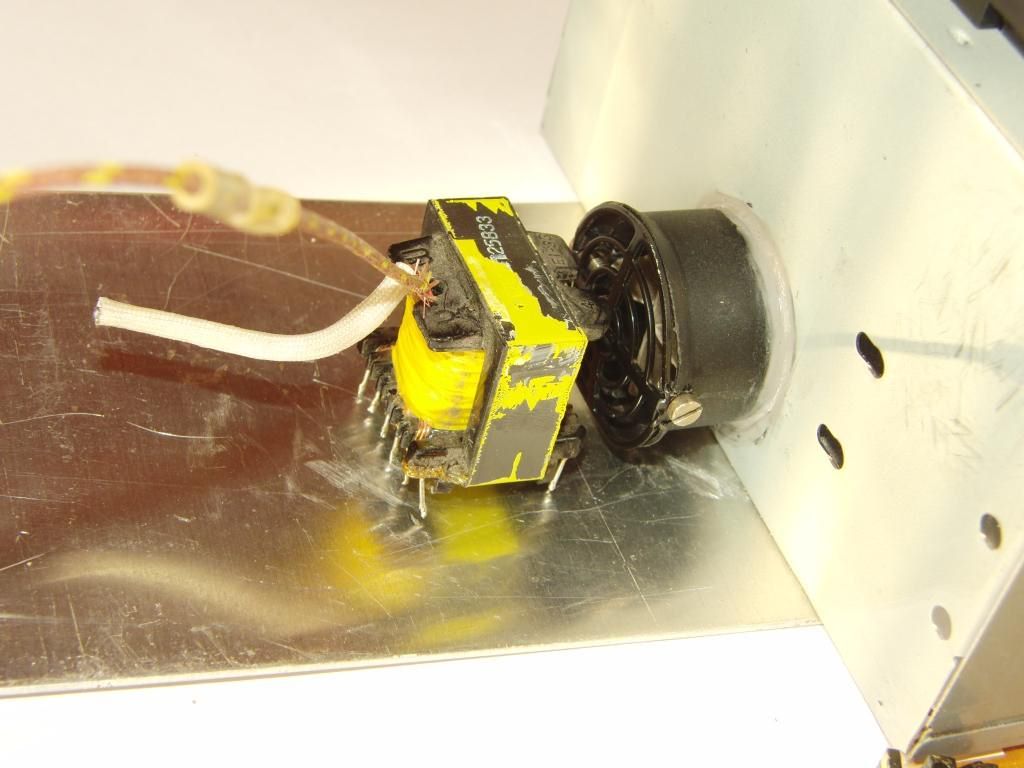
The motor with the fan blades was quickly determined to be the root cause of the noise. (Well, duh.) So it was removed and another airflow source was located. A 120×120 mm 220V AC cooling fan was picked up as the best cost/performance option. While still not entirely quiet, it was MANY decibels less and it was actually possible to withstand longer periods of working right next to it without turning mad.
First, to test if the airflow is sufficient for cooling of the heating spirals, a mockup was made, using aluminium foil and sellotape to channel the airflow from the fan through the heater block. The test results were satisfying.
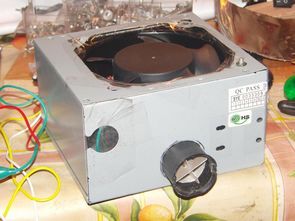
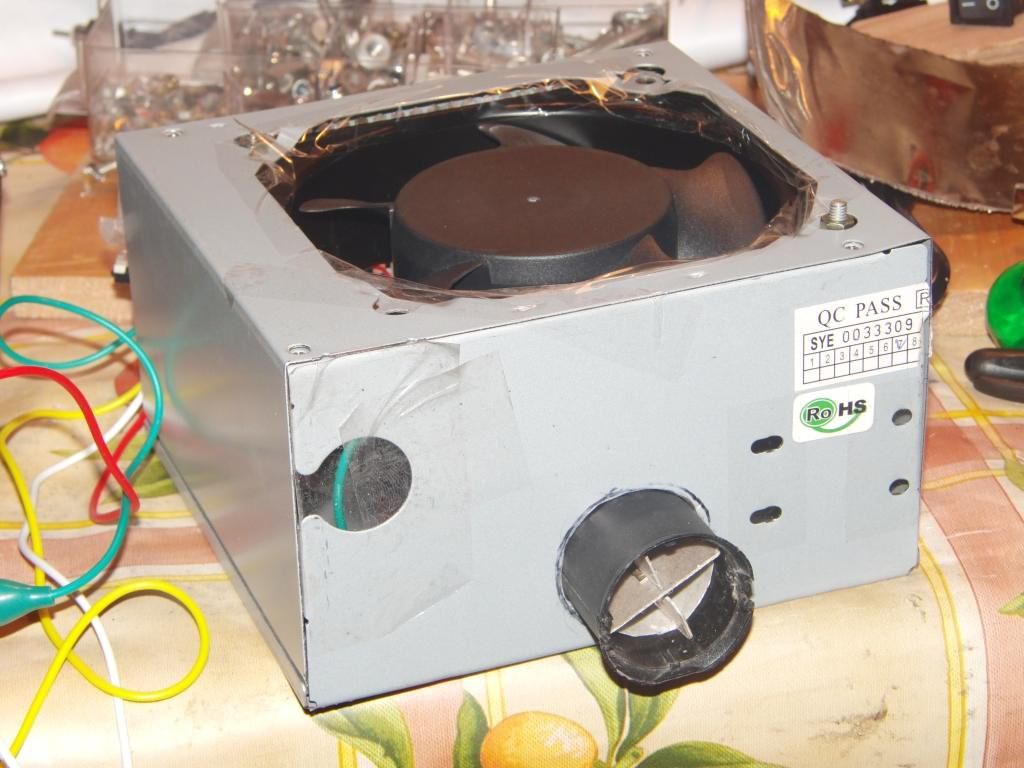
An old ATX power supply case was determined to be the best and easiest option, due to being metal (and therefore fireproof), easily available, and already with a precut hole for the 120 mm fan. The storage compatibility with the Spot Welder was another plus. A hole was cut in its side (by drilling a lot of adjanced holes, then cutting out the disc and filing off the ragged edges, ufff) and the heating element from the hairdryer was affixed in it.
The airflow in the new assembly was a bit lower than expected from the mockup tests. The box was apparently creating more air drag than the aluminium foil structure, increasing the pressure gradient inside and lowering the efficiency of the fan. The impact was however less than critical.
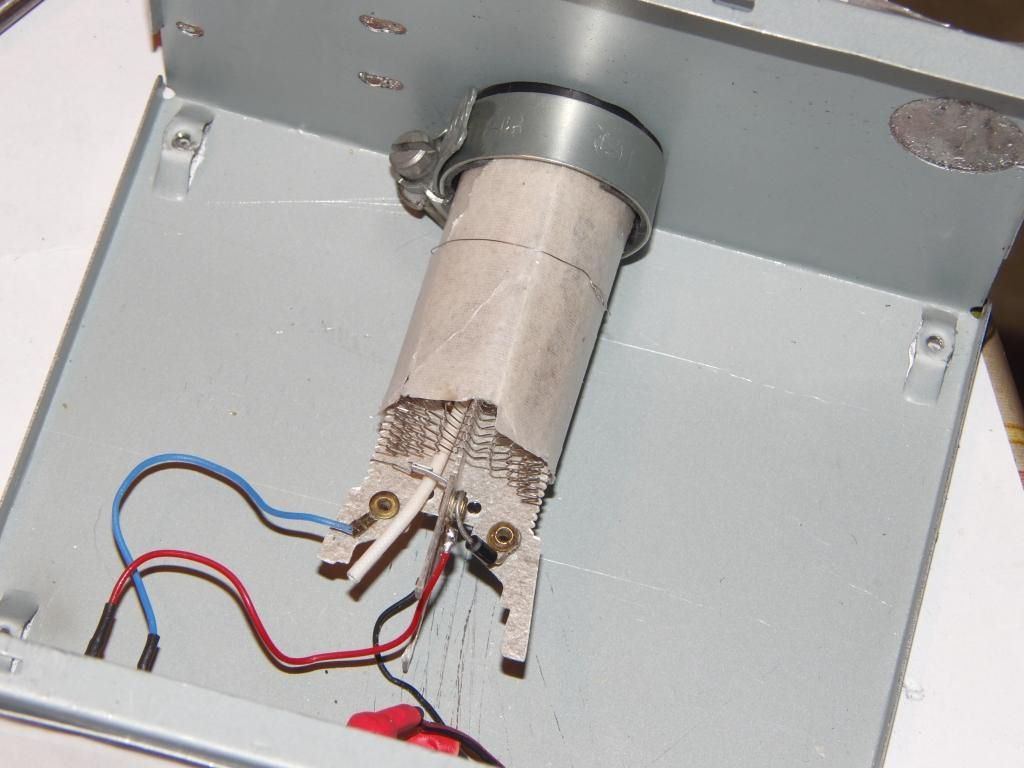
The resistive wire turned out to be more fragile than expected. It was damaged on two more places during handling, and a repair had to be performed. The same approach, brazing with brass and borax, was used as with the original hairdryer repair.
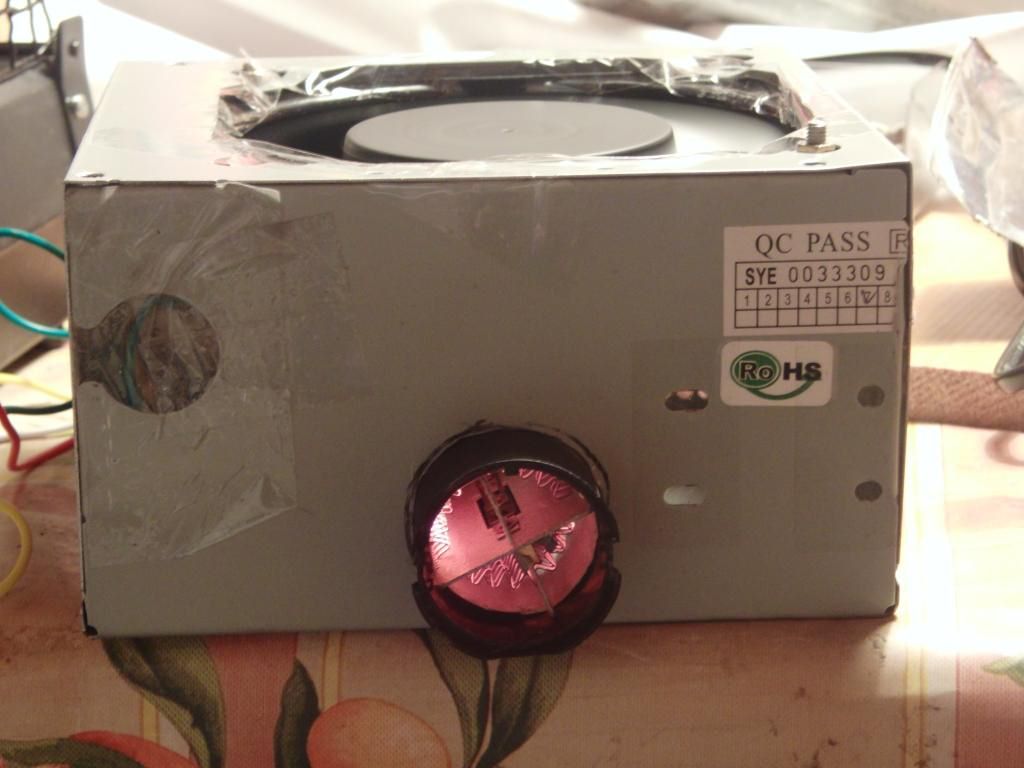
The holes in the casing were covered with sticky tape, in order to channel all the airflow through the heater. The mesh on one of the sides was covered with aluminium sheet.
The electrical wiring was simple. The main switch powers up the fan and enables the heaters. Two other switches power up (if enabled) the two heater segments. Originally there was a plan to add diodes in series with the heaters, with a switch to allow reducing the energy by half, however at the end it was decided to hardwire the diodes there without the switch, as the airflow was too low and the heaters were quickly overheating at full power. (Fortunately there is a bimetal-based thermal fuse in the heater assembly, which cuts the power to the heater when it overheats, preventing lasting damage.)
The heater assembly was secured in place using silicone caulking.
It was measured that the air temperature at the outlet at full power is around 250 °C, which is just about right ceiling to not damage most things. The temperature drops with distance from the vent.
The unit proven to be useful for gentle drying of paints, melting of some compounds (e.g. wax), and softening adhesives and plastics. Its relatively low noise is a definitive plus in comparison with the original hairdryer; that goddamned thing was AWFULLY loud.
source: http://shaddack.twibright.com/projects/hw_HotAirBlower


Récupération des noyaux de ferrite avec de l’air chaud
Méthode: récupération des noyaux de ferrite
Pourquoi
Le monde regorge d’électronique rejetée sans ménagement. Cette électronique contient des alimentations. Ces alimentations contiennent un certain nombre de magnétiques, à savoir des transformateurs et des selfs avec des noyaux en ferrite, de toutes sortes de tailles et de formes (enfin, généralement E ou EI, mais de toute façon). Une alimentation d’ordinateur en aura plusieurs. Une ampoule CFL morte aura généralement une paire – un tore pour les transistors et un starter pour la suppression EMI.
Les noyaux de ferrite ont tendance à être coûteux et difficiles à trouver. Une façon d’en obtenir gratuitement est donc toujours la bienvenue. Cependant, les transformateurs récupérés sont généralement mis en pot dans une sorte de résine et ne peuvent pas être démontés. La ferrite est également très fragile, ce qui empêche d’utiliser une force plus grande que petite.
Comment
L’Internet dans sa sagesse a offert quelques indices. Certains sur le trempage des transformateurs dans des solvants pendant des heures ou des jours, d’autres sur l’ébullition des transformateurs dans de l’eau pendant dix minutes. Habituellement, les méthodes étaient humides et / ou malodorantes et généralement désagréables.
Une expérience a été tentée avec le souffleur à air chaud. Un transformateur en ferrite, après avoir enlevé le ruban adhésif autour du noyau, a été placé devant sa buse d’échappement et le ventilateur a été mis en marche à pleine puissance. Le transformateur a été laissé à cuire dans de l’air à 200 ° C jusqu’à ce qu’il soit si chaud qu’une goutte d’eau grésilla sur la ferrite. Ensuite, le transformateur a été retiré du flux d’air chaud et le noyau a été desserré avec un léger levier avec un petit tournevis à lame mince. Le matériau qui maintenait la chose sanglante se ramollit vraiment lorsqu’il est chauffé au-dessus de 100 ° C; le noyau se déplaçait légèrement dans la bobine et était prêt à être retiré. L’autre moitié du noyau a ensuite été poussée hors de la canette par une légère pression constante à travers le trou de la canette.
You can use a air fryer for food, these can go to 50 min to 200 degrees max.