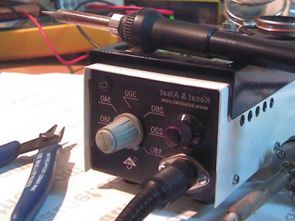
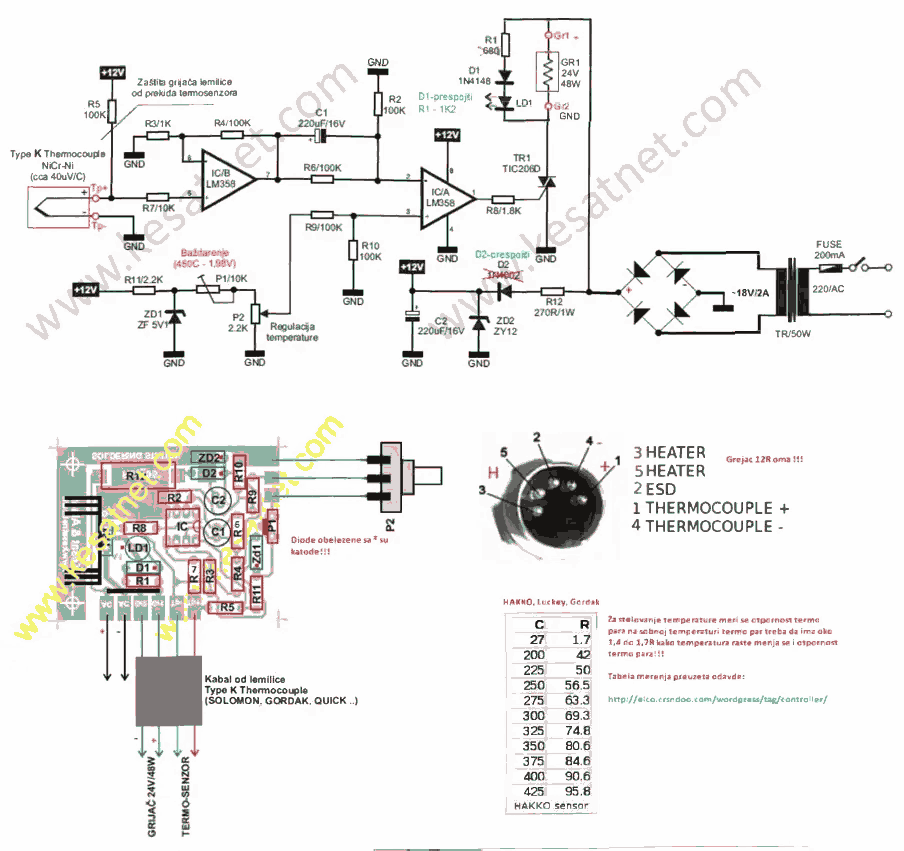
In the analog soldering station project, a “K” type thermocouple was used for temperature measurement. With the adjustable soldering iron circuit, Quick, Solomon and Gordak brand soldering irons were tested for 48 hours and excellent results were obtained in terms of operating safety and maintaining the set temperature.
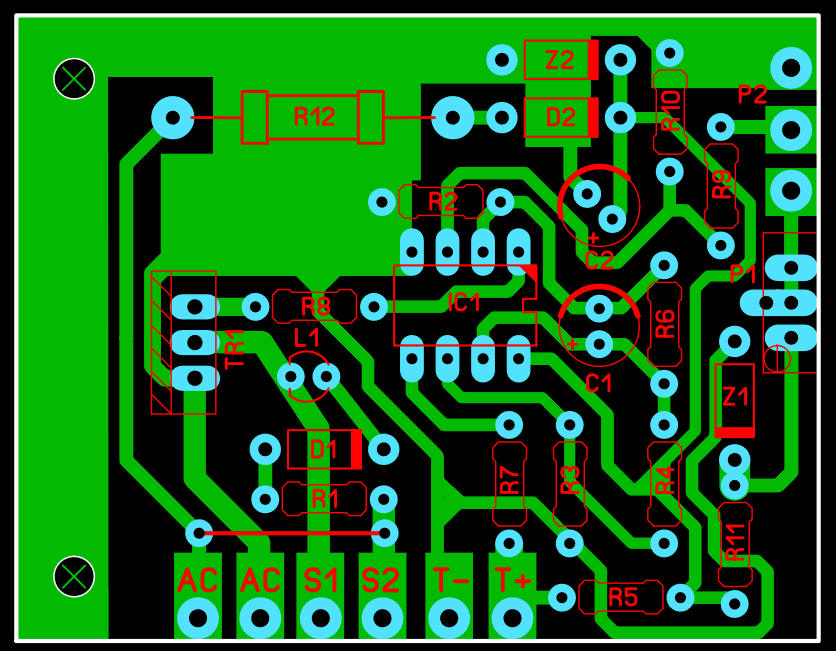
A 24VAC 60W transformer is used for the soldering iron control circuit and the soldering iron. It is stated that attention should be paid to the selection of the thyristor. If you cannot find a TIC206 thyristor, you can use a similar thyristor with a gate current of 5mA.
Analog soldering station circuit diagram
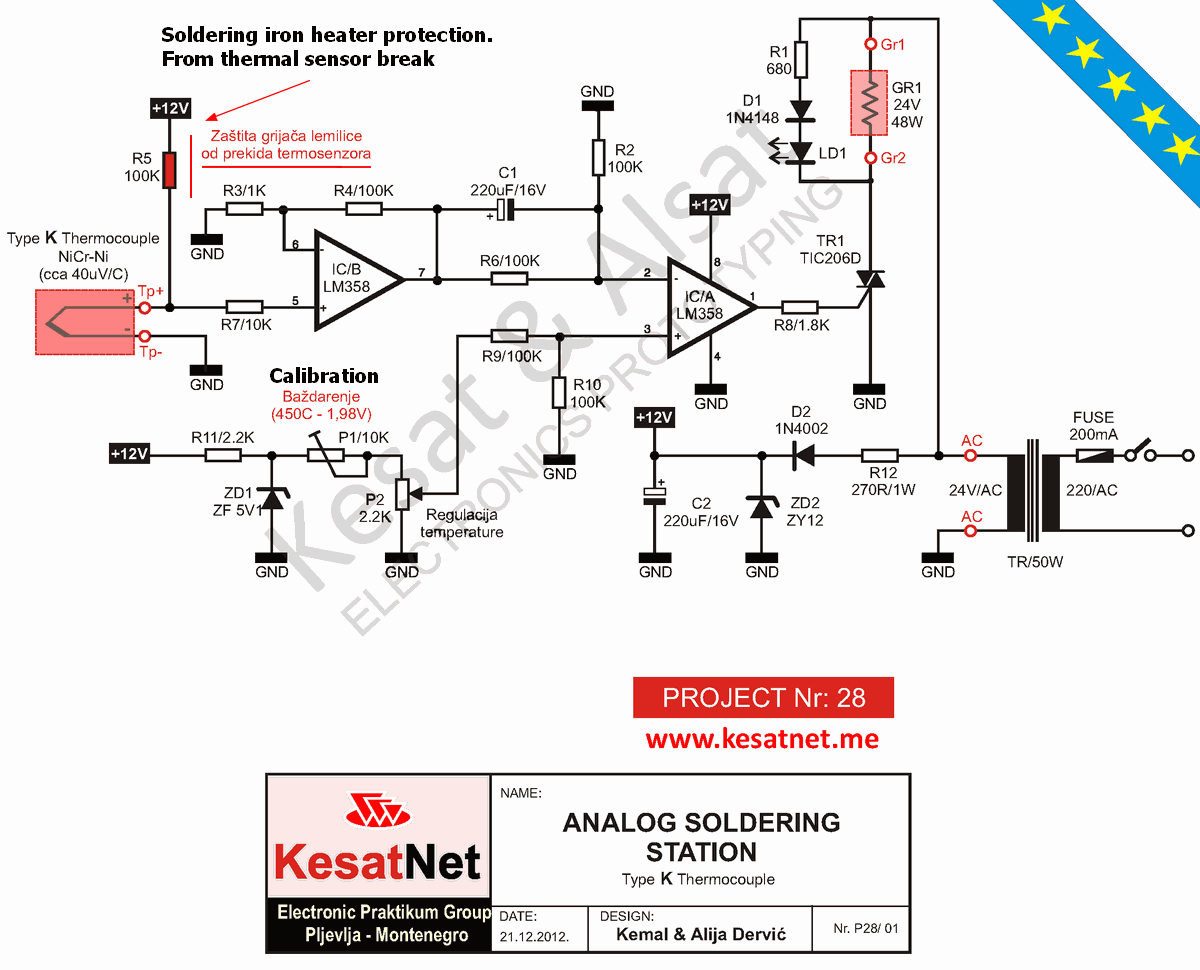
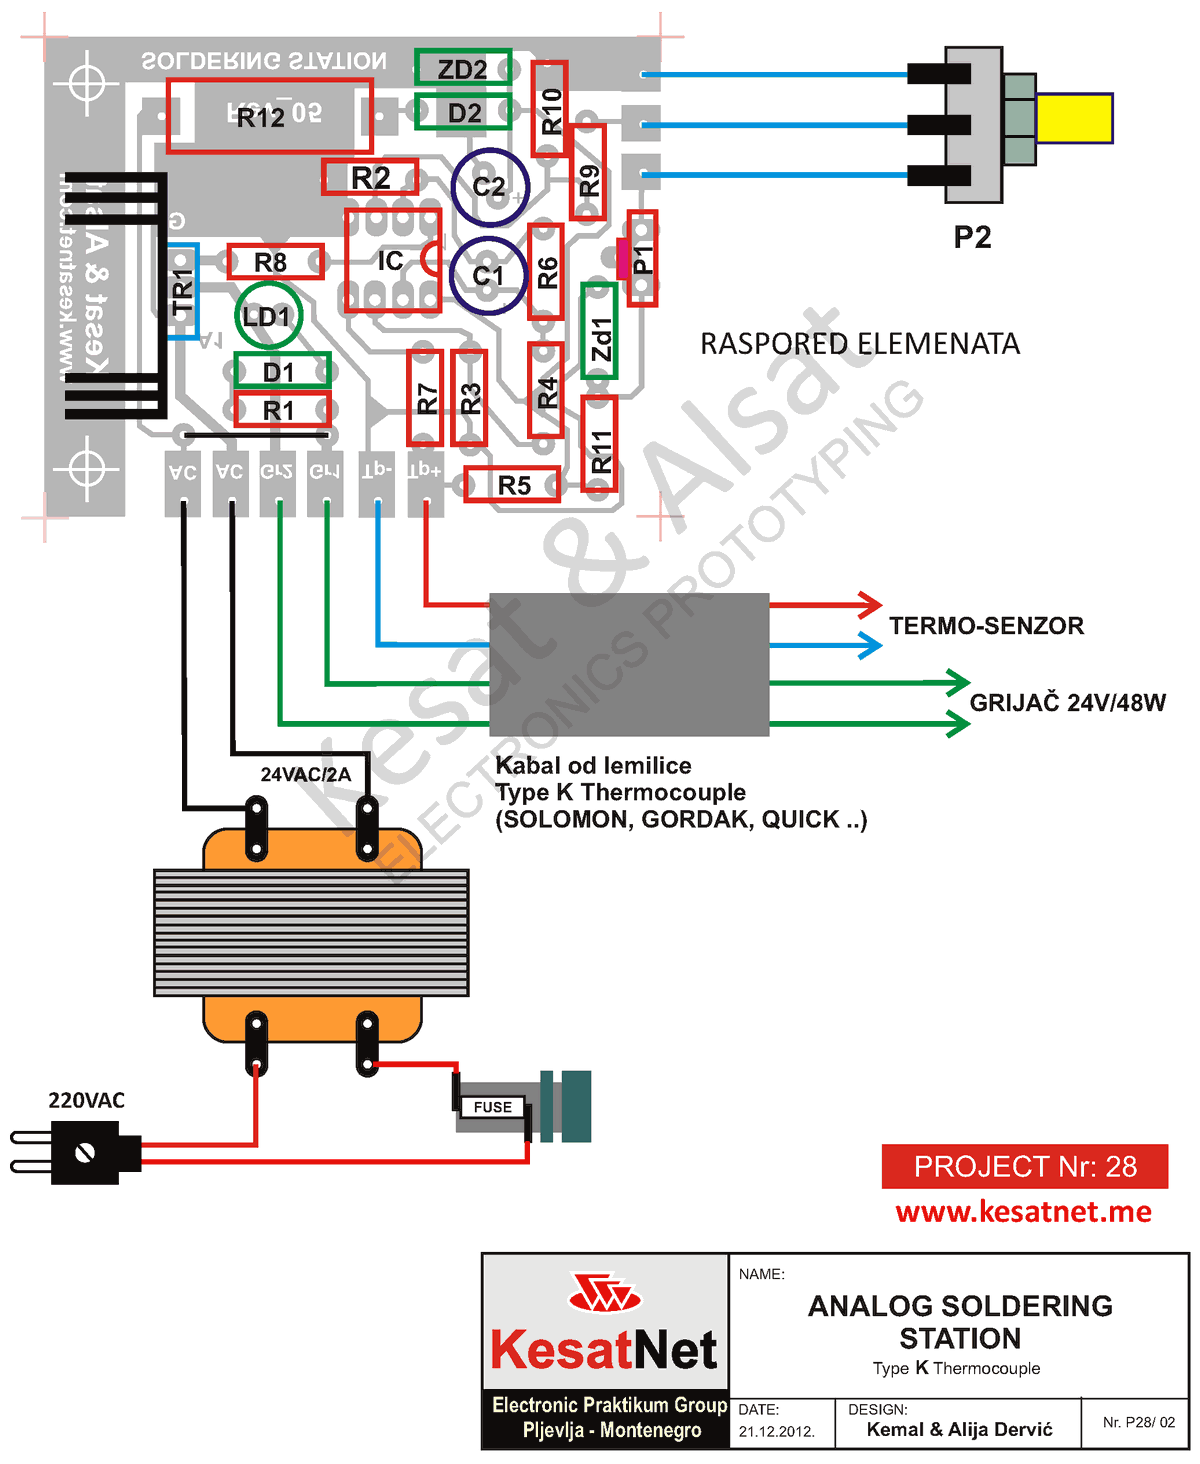
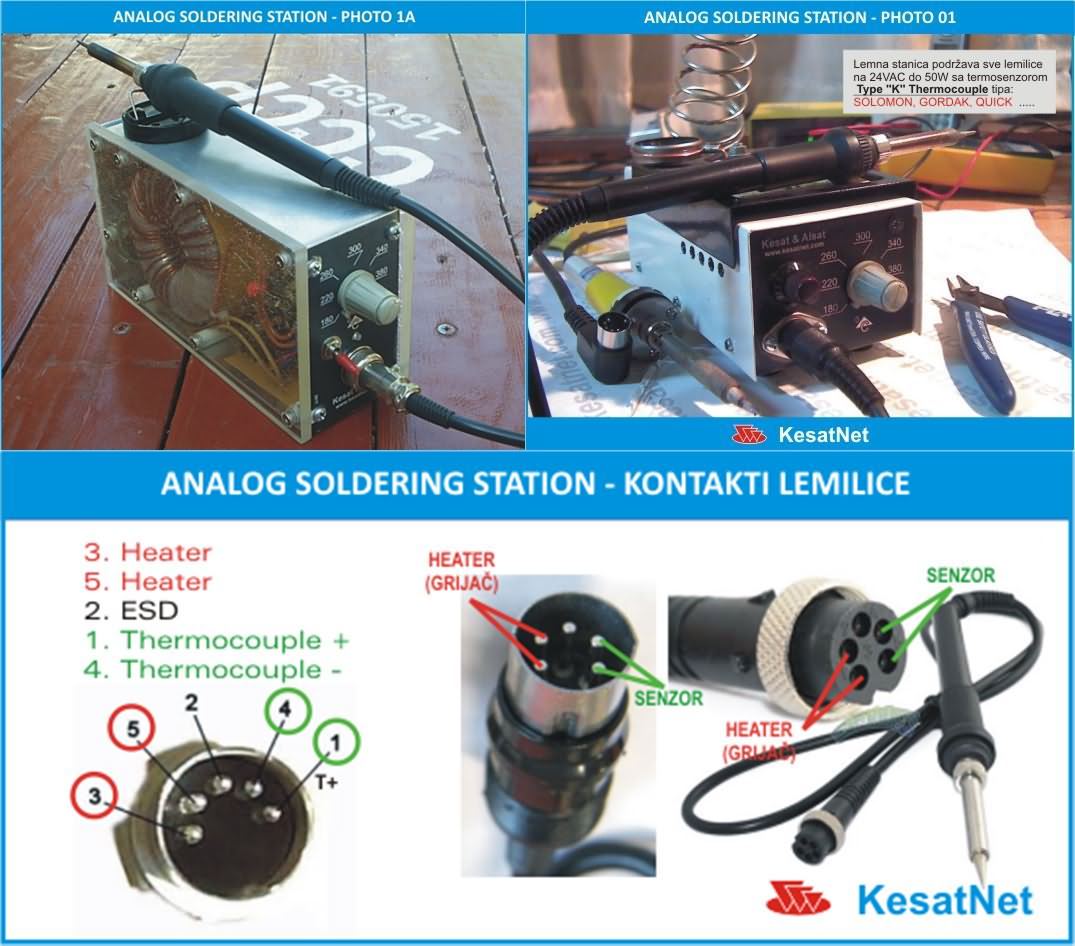
The resistance of the soldering iron resistor is approximately 10-12 Ohm, while the resistance of the thermocouple sensor is approximately 2 Ohm. For calibration, the soldering iron will be adjusted until it reaches 1.98V on the P1 10K trimpot at 450 degrees.
If you want to use the adjustable soldering iron with a 24VDC power supply, connect a wire instead of the D2 diode and use the R1 resistor as 1.2K.
Şifre-Pass: 320volt.com
Source: kesatnet.me/analogna-lemna-stanica
Publication date: 2024/12/17 Tags: power electronic projects